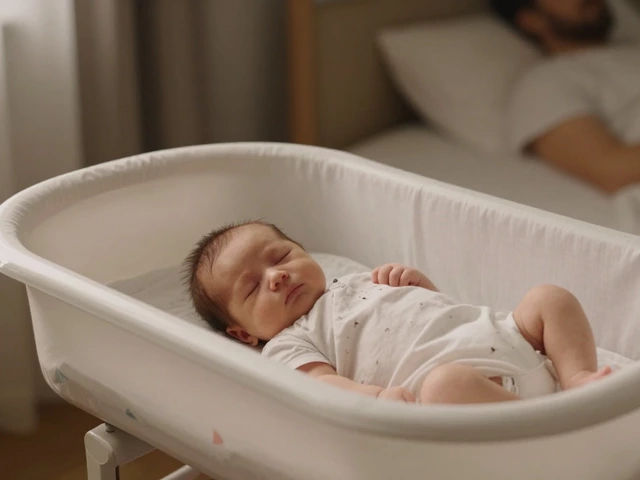
If you’re looking at that perfectly good dresser in your guest room and thinking, “Could this work in the nursery?”—you’re not alone. The price tag on new nursery furniture can make anyone dizzy, so repurposing a regular dresser can feel like a handy shortcut. But is it actually safe or smart for your baby’s first room?
A lot of new parents skip the matchy-matchy toddler sets and start with pieces they already own. A dresser seems simple—it’ll hold tiny onesies, extra sheets, and adorable sock collections just fine. Plus, not all nursery-specific dressers are high quality; sometimes you’ll get sturdier, better-built furniture sticking with what you’ve got.
Before you move that dresser in, there are a few things that matter more than appearance. Safety teams (including the folks at the Consumer Product Safety Commission) actually warn that furniture tip-overs are a higher risk than most of us guess, especially with curious toddlers and wobbly babies exploring. Swapping out knobs for something chunkier, anchoring the dresser to the wall, and checking for soft-close drawers is worth your time.
- Why Consider a Normal Dresser for Your Nursery?
- Safety First: Key Things You Must Check
- Making Organization Work for Baby Essentials
- DIY Dresser Makeovers: Simple Upgrades for Nursery-Ready Furniture
- What the Experts Say (and What Surprised Me Most)
- When a Normal Dresser Isn’t Enough: Knowing the Limits
Why Consider a Normal Dresser for Your Nursery?
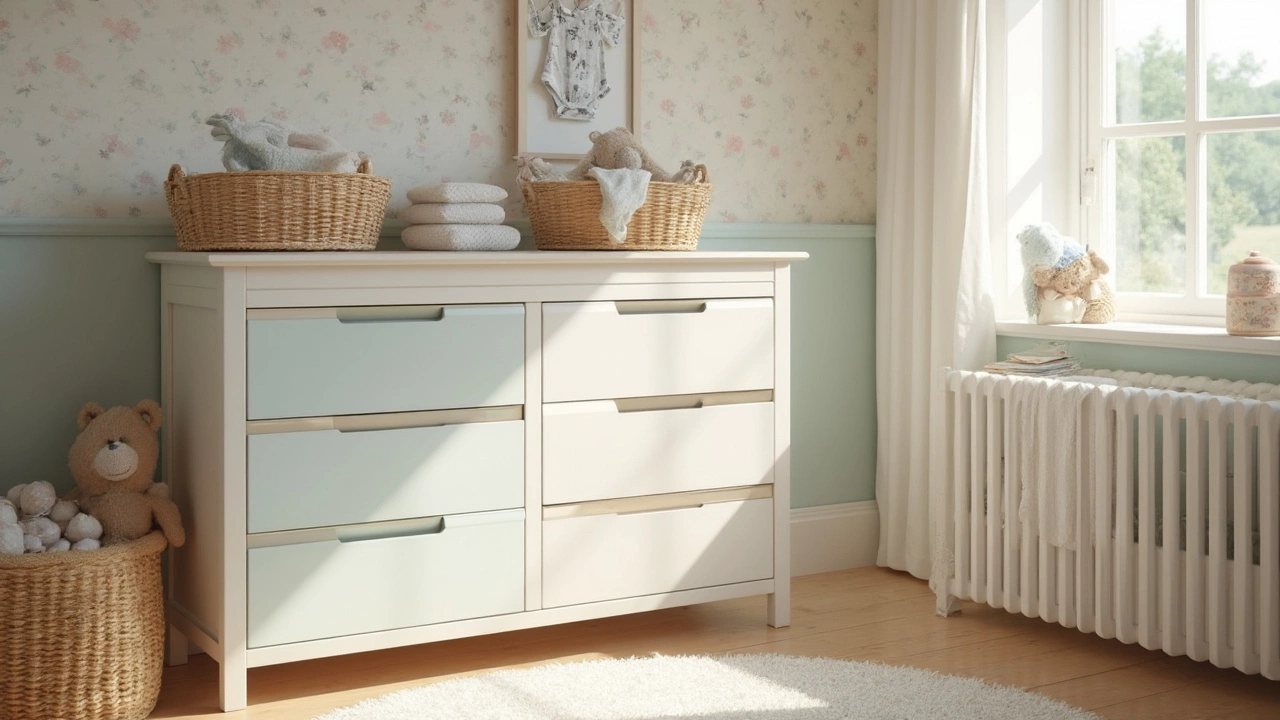
Not every nursery needs a fancy, purpose-built baby dresser. Grabbing a nursery dresser from your regular furniture lineup is actually pretty common—and there are good reasons for it.
First off, cost. The average nursery-specific dresser is priced 30-50% higher than a standard dresser of similar size and quality, and all those savings add up when you’re buying cribs, strollers, and diapers at the same time.
Storage-wise, most regular dressers have equal or even more drawer space than their "nursery" counterparts. That’s extra room for swaddle blankets, wipes, and way too many baby outfits (if you know, you know). Sometimes, regular dressers are even sturdier, built from solid wood instead of lightweight particle board.
Multi-use furniture is a parenting win. Down the road, your baby dresser can move to a kid’s or guest room without screaming “baby furniture.” It won’t look out of place when you redecorate or your kiddo gets a big kid bed. Plus, if your home is tight on space, it’s easier to make a normal dresser fit your style and floor plan.
"A classic dresser can work beautifully as a changing station and storage center in a nursery, often lasting longer and fitting multiple stages of childhood." – Emily Henderson, Interior Designer
If you’re a fan of DIY, a normal dresser opens up possibilities for paint, new hardware, or adding a cushioned changing pad on top—no need to stick to the nursery aisle.
- Nursery storage is more flexible with a regular dresser—organizers and dividers slide right in.
- You skip the wait: no special orders, long shipping, or assembly nightmares.
- It usually blends better with your grown-up furniture and doesn’t feel temporary.
Plus, let’s be real: babies outgrow everything, so starting with flexible furniture just makes sense for most families.
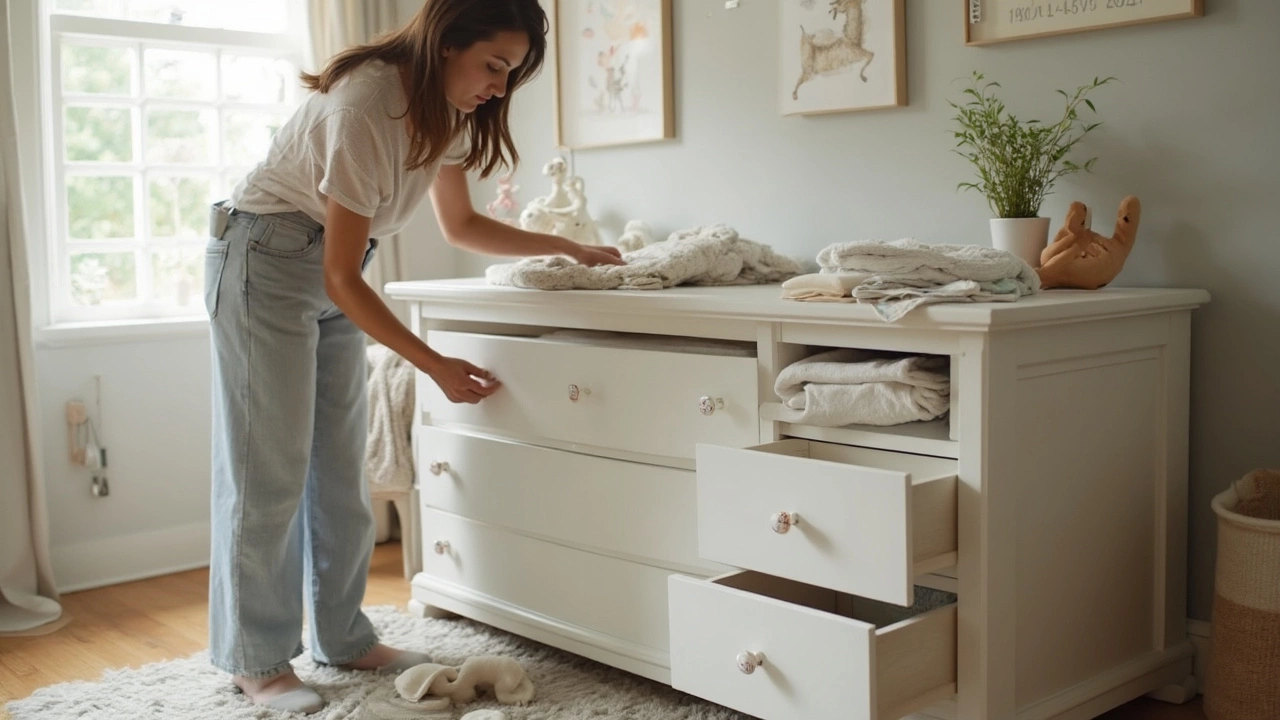
Safety First: Key Things You Must Check
Before you drag your nursery dresser into the baby’s room, it’s smart to check a few things most people overlook. Not all dressers are made with curious babies in mind. A regular dresser isn’t dangerous by default—but it can be risky if certain boxes aren’t checked.
Furniture tip-overs send thousands of kids to the ER every year. According to the Consumer Product Safety Commission, an average of 11,300 children are treated in the U.S. yearly for tip-over injuries involving dressers, chests, and bureaus. It’s not about scaring you; it’s about making sure your baby furniture is rock solid.
- Anchor the dresser to the wall: Seriously, don’t skip this part. Even if your baby won’t be pulling up for months, get a wall anchor kit and use it. Most hardware stores sell brackets for a few bucks. Anchoring prevents a “fluke accident” you’d regret forever.
- Test drawer stops: Pull every drawer out and check that it doesn’t tip all the way out or fall on the floor. If drawers slide out too easy, little hands can turn one into a ladder or create a smash hazard. Consider adding simple stop blocks if you need to.
- Check stability: Put a little pressure on the front and sides of your dresser. If it wobbles or leans, it’s not ready. Wobbly dressers can get a quick fix by tightening screws, adding adhesive pads under the legs, or even moving it to a flatter part of the floor.
- Mind the paint or finish: Was your dresser made before 1978? Double check that it’s not coated with lead paint. Lead testing kits are cheap and take five minutes to use. Babies mouth everything, and you don’t want any risk here. If the paint is chipped or bubbly, sand and repaint with a non-toxic option.
- Swap out dangerous hardware: Long or pointy handles can snag clothing or cut tiny hands. Swap for smooth knobs or kid-safe options. There are tons of cute, safe hardware options online now.
| Hazard | Quick Fix |
|---|---|
| Unsecured dresser (tip-over risk) | Install wall anchor kit |
| Drawers slide out fully | Add stop blocks or drawer latches |
| Possible old/lead paint | Test paint, refinish with baby-safe paint |
| Sharp hardware | Replace with rounded or soft knobs |
Don’t forget to check if the dresser fits safely in your room layout, leaving space to open drawers without blocking doorways. One more real-life tip: if you’re using the top of your nursery dresser as a changing station, always keep one hand on baby and don’t store heavy stuff overhead. Little tweaks like these turn a regular piece of furniture into safe baby furniture you can trust.
Making Organization Work for Baby Essentials
Setting up a nursery dresser is all about making your life easier in those challenging first months. Baby stuff adds up fast—diapers, wipes, creams, changing pad covers, onesies in every size, tiny socks, and burp cloths. If you’re using a regular dresser instead of nursery-specific furniture, you’ll want to get strategic with your storage.
Start by sorting the dresser drawers by category. Keep the most-used items (like diapers and onesies) in the top drawers so you’re not constantly bending down. The deeper bottom drawers are perfect for blankets, backup crib sheets, or bulkier baby gear. Drawer organizers and fabric bins are lifesavers here; you can grab a set from any big box store or online. Even a simple set of dollar store baskets can turn a big empty drawer into baby-central.
One easy system is to dedicate each drawer to a type of item. For example:
- Top left: Diapering gear (diapers, creams, wipes)
- Top right: Everyday clothes (onesies, pants, tops)
- Middle drawers: Pajamas, swaddles, sleep sacks
- Bottom drawers: Spare bedding, baby towels, back-up clothes
Babies outgrow clothes fast. If you’re short on space, keep only the current size in the dresser and store the next sizes in a labeled bin under the crib or in the closet. That way, your nursery storage doesn’t get cluttered, and midnight outfit changes don’t end in chaos. Pro tip: Keep a spare pack of wipes and a couple of diapers in each drawer—so you’re never caught off guard when things get messy (which, let’s be real, happens all the time).
“Organizing your baby’s dresser ahead of time helps you tackle those unexpected messes in seconds and keeps you focused on the moments that matter.” — Emily Henderson, interior designer and mom of three
Some parents, including myself, like to use drawer dividers especially for those tiny items like mittens and socks. It’s wild how fast those things disappear. If you’re using a regular dresser for baby furniture, add non-slip drawer liners—this keeps bins from sliding, even during a midnight drawer raid.
Check out this quick comparison of organization helpers for dressers:
| Product | Main Use | Approx. Price (2025) |
|---|---|---|
| Drawer Dividers | Separating clothes, small items | $12–$20 per set |
| Fabric Bins | Grouping similar things | $10–$18 for 4-pack |
| Non-slip Liners | Keeping bins/dividers in place | $8–$15 per roll |
Finally, label everything if you can. You won’t remember where you put the baby nail clippers at 3am. Even simple sticky notes or masking tape will work in the beginning. You’ll be grateful for it.
DIY Dresser Makeovers: Simple Upgrades for Nursery-Ready Furniture
Don’t ditch that old nursery dresser just because it looks out of place next to the crib. With a handful of easy tweaks, you can turn nearly any regular dresser into a safe, practical, stylish part of your baby furniture setup. The best part? Most of these updates take just a weekend and don’t cost much.
First up, think about safety. Anchoring is a non-negotiable—install an anti-tip kit. These are cheap at most hardware stores, and you’ll sleep better knowing that furniture tip-overs are actually the #1 reason for U.S. child injuries from furniture, way ahead of pinched fingers or splinters. In fact, according to the CPSC, a child is sent to the ER roughly every 30 minutes from a furniture tip-over accident. (Source.)
Now, let’s talk upgrades you’ll actually use every day:
- Swap out knobs or handles. Go for large, round knobs instead of tiny pulls. They’re easier to grab during late-night diaper changes and are less of a choking hazard if they come loose.
- Drawer liners make a difference. Skip the fancy stuff—just use shelf liner so tiny socks don’t slip around. They also make cleaning spit-up or lotion spills so much easier.
- Add soft-close drawer hardware. If your dresser slams shut, swap in soft-close rails (they’re under $30 for most dressers). This way, you’re not waking the baby—seriously, it makes a difference.
- Install drawer dividers. You can buy cheap plastic or bamboo organizers for under $15 on Amazon or big box stores. These keep baby essentials sorted so you’re not digging around for a missing mitten at 3 a.m.
- Touch up the finish. If there’s chipped paint, sand it down and paint over with a non-toxic, low-VOC paint. Older furniture can have lead paint if it’s from before the 1970s, so test it or go for a full repaint if you’re unsure.
Here’s a quick peek at upgrades new parents tackle most often:
| Upgrade Type | Average Cost | Estimated Time |
|---|---|---|
| Anti-Tip Restraint Kit | $10 - $20 | 15 minutes |
| Soft-Close Hardware | $15 - $40 | 30-60 minutes |
| New Knobs/Handles | $10 - $30 | 20 minutes |
| Drawer Dividers & Liners | $10 - $25 | 30 minutes |
| Non-Toxic Paint/Touch-Up | $20 - $50 | 2 hours (plus drying) |
If you want maximum flexibility, consider adding a removable changing tray on top. You can find these for around $35, and they let you turn your dresser into a changing table without permanent screws or bumps. When you don’t need it anymore, just lift it off.
Making these basic changes doesn’t just stretch your budget—it makes daily life smoother. If you do get stuck or something doesn’t fit quite right, there are endless step-by-step videos online for every dresser style.
What the Experts Say (and What Surprised Me Most)
I always thought a dresser was just a dresser, but expert advice changed my mind fast. Most pediatricians and baby safety engineers don’t care what your furniture looks like. What they do care about is how safe and sturdy it is—especially when you’re using a nursery dresser where a baby might wiggle, crawl, or someday try to climb.
The American Academy of Pediatrics doesn’t require nursery-specific dressers. They point out that as long as you anchor the furniture securely and avoid sharp or broken corners, a regular dresser is totally fair game. But after scanning a couple of recent Consumer Product Safety Commission reports, I was surprised: furniture tip-overs send thousands of kids to the ER every year. In fact, their 2023 report showed over 11,300 ER visits for tip-over-related accidents—dressers and chests were the biggest culprits.
| Year | Tip-Over ER Visits (Children Under 5) |
|---|---|
| 2022 | 10,800 |
| 2023 | 11,300 |
That stat pushed me to grab the anti-tip brackets right away. Experts from the National Safety Council say anchoring isn’t optional—it’s a must. So if you’re bringing a baby furniture piece like a normal dresser into your nursery, set aside ten minutes and a cheap L-bracket kit to bolt it down. Seriously, it’s the single best move for safety.
Something else that caught me off guard: experts don’t think soft-close drawers are just a luxury. Child safety groups say soft-close prevents smashed little fingers and makes it way less likely your baby will yank a drawer out someday. Also, babies start pulling up on anything with a ledge (like the top drawer), so heavier bottom drawers and smooth-glide hardware (the kind from newer IKEA or Target collections) get a thumbs-up from safety pros.
Organization hacks—like filing onesies upright and stashing changing table essentials in the top drawer—are basically universal, whether you have a "nursery" dresser or not. Interior designers I talk to keep repeating: the right layout makes more difference than the name on the furniture. Go for deeper drawers or swap drawer dividers if your current dresser is a little chaotic.
Long story short, experts give a green light to repurposing a nursery dresser as long as you watch those safety and practical details. Don’t skip the boring (but important) checks, and you can save both money and stress for months to come.
When a Normal Dresser Isn’t Enough: Knowing the Limits
Sometimes, a normal nursery dresser just can’t handle all the stuff you need to keep your baby’s room running smoothly. Here’s where that reliable old piece starts feeling less like a resource and more like a headache. There are a few red-flag moments to watch for, so let’s call them out.
If you’re planning on using your dresser as a changing table, check the height. Most grown-up dressers are either too high or awkwardly low, which means more back pain for you—no one wants that at 3 a.m. with a squirmy kid. Also, a standard dresser top might be too shallow for a safe and stable changing pad. You want at least 18 to 20 inches of depth, otherwise, things can tip.
Drawer size matters too. Baby clothes are tiny, but you’ll want to keep diapers, wipes, and big packs of other essentials all in one spot. If the drawers are too deep or too shallow, organizing becomes a pain. Worse, bad tracks or sticky drawers make middle-of-the-night changes way more stressful than they need to be. Experts say that reliable, easy-glide drawers actually make life easier with a newborn.
And, let’s talk capacity. Babies grow quick, and their stuff multiplies. That dresser that worked for onesies might not have room once you’ve added larger clothes, sleep sacks, and random gear. Some families end up adding so many baskets or organizers that it defeats the whole point of using the dresser in the first place.
There’s also the safety side. If your baby furniture is older, double-check for lead paint or handles that can be unscrewed by tiny hands. After 1978, lead paint was banned in the U.S., but vintage dressers (even pretty ones from thrift shops) might still have risks. Drawers that slam shut can pinch fingers fast, so self-closing or soft-close drawers become more important as baby starts moving around.
When a dresser shows these limits—or makes your life harder rather than easier—it might be time to consider nursery-specific options or at least upgrade some features. If you find yourself hitting any of these snags, don’t force it; babies need practical, reliable storage as much as adults.
| Common Issue | Drawback | Better Option |
|---|---|---|
| Too shallow top | Unsafe for changing pad | Look for 18”+ depth |
| Heavy, hard-to-move drawers | Difficult at night; pinched fingers | Soft-close, smooth-glide drawers |
| Limited capacity | Frequent reorganizing, spills out | Multiple smaller drawers, organizers |
| Non-anchored furniture | Tip-over risk | Wall anchors & brackets |
| Vintage paint | Lead risk | Check or repaint safely |
So, there are real limits, and ignoring them can make life with a new baby way more stressful than it has to be. Sometimes, investing in true nursery storage pays off because let’s face it—babies may be tiny, but their stuff takes up real space.